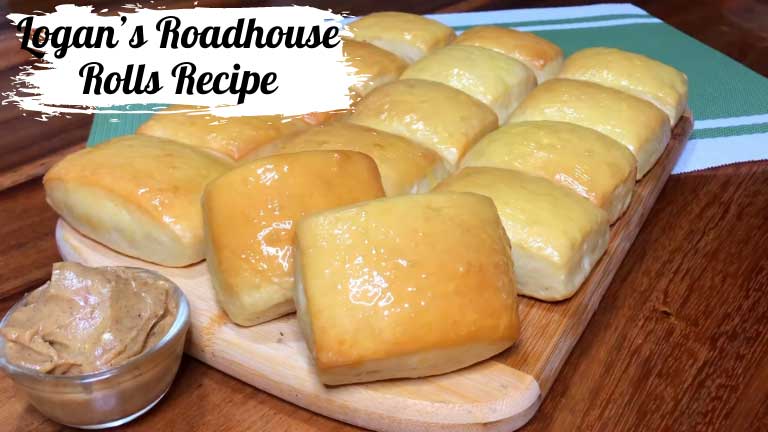
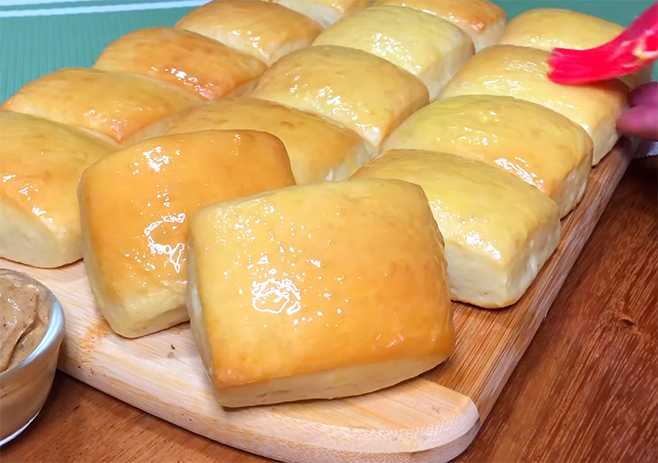
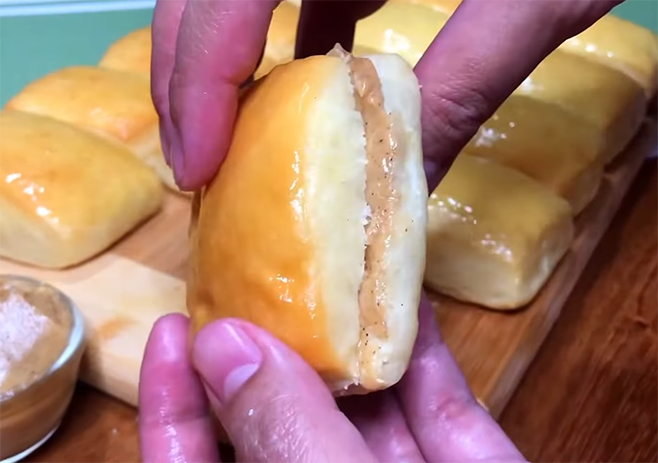
Are you craving the irresistible, melt-in-your-mouth Logan’s Roadhouse rolls? Look no further! We’ve unlocked the secrets to creating these heavenly, buttery rolls right in your own kitchen.
Our easy-to-follow copycat recipe will guide you through each step, from activating the yeast to achieving that perfect golden-brown crust. With simple ingredients and a few key techniques, you’ll be serving up soft, fluffy rolls that rival the originals.
Get ready to impress your dinner guests with these warm, freshly-baked delights. Whether you’re a baking novice or a seasoned pro, this recipe is foolproof. We’ll even show you how to whip up the signature cinnamon honey butter for the ultimate Logan’s Roadhouse experience.
Ready to embark on this delicious baking adventure? Let’s roll up our sleeves and dive in!
The Ultimate Logan’s Roadhouse Rolls Copycat Recipe
Unveiling the Secrets of Logan’s Roadhouse Rolls
Have you ever wondered what makes Logan’s Roadhouse rolls so irresistible? Those warm, buttery bites of heaven that melt in your mouth?
Well, you’re in for a treat! Today, we’re pulling back the curtain on these famous dinner rolls.
Logan’s Roadhouse, known for its sizzling steaks, has another star on its menu – their iconic rolls. These aren’t just any dinner rolls; they’re a perfect blend of soft, fluffy, and buttery goodness.
But why limit yourself to enjoying these rolls only at the restaurant? Imagine being able to recreate that same magic in your own kitchen.
Picture this: It’s a cozy Sunday afternoon. The aroma of freshly baked rolls fills your home. Your family gathers around, eagerly waiting for that first warm, buttery bite. Sounds perfect, doesn’t it?
That’s exactly what we’re going to achieve with this copycat recipe. We’ll walk you through each step, sharing tips and tricks to get that authentic Logan’s Roadhouse roll taste and texture.
From mixing the dough to that final brush of melted butter, we’ve got you covered. Whether you’re a baking novice or a seasoned pro, you’ll find this recipe easy to follow and the results absolutely delicious.
So, roll up your sleeves, preheat that oven, and get ready to bake some seriously amazing rolls. Your taste buds (and your family) will thank you!
💡 Key Takeaways: Logan’s Roadhouse rolls are beloved for their soft texture and buttery flavor, and with this copycat recipe, you can recreate this restaurant favorite in your own kitchen.
Essential Ingredients for Perfect Logan’s Roadhouse Rolls
Ready to dive into baking? Let’s start with the heart of any great recipe – the ingredients. For our Logan’s Roadhouse rolls, we’ll need:
The Basics
– All-purpose flour: The foundation of our rolls.
– Granulated sugar: For a touch of sweetness.
– Salt: To enhance all the flavors.
The Leavening Agents
– Active dry yeast: This is what makes our rolls rise and become fluffy.
– Warm milk: To activate the yeast.
The Enrichments
– Unsalted butter at room temperature: For that rich, buttery flavor.
– Egg: To bind everything together and add richness.
The Finishing Touch
– Melted butter: For brushing on top of the baked rolls.
Each ingredient plays a crucial role in creating that perfect Logan’s Roadhouse roll. The warm milk and room temperature butter ensure everything blends smoothly. The yeast, when activated properly, gives us that coveted soft, airy texture.
Remember, using simple, quality ingredients is key to achieving that authentic taste. So, gather your small bowls, measuring cups, and let’s get ready to create some roll magic!
💡 Key Takeaways: Quality, simple ingredients are the secret to recreating the authentic taste and texture of Logan’s Roadhouse rolls at home.
Kitchen Equipment You’ll Need
Before we start mixing and kneading, let’s make sure we have all the right tools for the job. Here’s what you’ll need:
Mixing and Kneading
– Large mixing bowl: For combining all our ingredients.
– Stand mixer with dough hook (optional): Makes kneading a breeze.
– Bread machine (optional): Another great tool for mixing and kneading.
Baking
– Baking sheet: For baking our perfectly shaped rolls.
– Parchment paper: To prevent sticking.
Measuring and Prepping
– Measuring cups and spoons: For accurate measurements.
– Small bowl: For proofing the yeast.
– Pastry brush: For brushing on that final layer of melted butter.
Don’t worry if you don’t have a stand mixer or bread machine. While they can make the process easier, you can absolutely make these rolls with just a large bowl and some elbow grease!
💡 Key Takeaways: While specialized equipment can be helpful, you can successfully make Logan’s Roadhouse rolls with basic kitchen tools and a bit of effort.
Preparing Your Workspace and Ingredients
Before we dive into the dough-making process, let’s set ourselves up for success. Here’s how to prepare:
1. Clear your countertop: You’ll need a clean, spacious surface for kneading and shaping the rolls.
2. Gather your ingredients: Having everything within reach makes the process smoother.
3. Bring butter and egg to room temperature: This helps them incorporate better into the dough.
4. Warm the milk: It should be warm to the touch, but not hot. Think of it as a cozy bath for the yeast.
5. Prepare your floured surface: Sprinkle some flour on a clean linen or your countertop. This will be for kneading the dough later.
6. Preheat your oven: This ensures it’s at the right temperature when your rolls are ready to bake.
7. Line your baking sheet: Use parchment paper for easy cleanup.
By setting up your workspace properly, you’re already one step closer to those perfect Logan’s Roadhouse rolls. It’s like mise en place in professional kitchens – everything in its place, ready to go!
💡 Key Takeaways: Proper preparation of your workspace and ingredients sets the stage for a smooth and successful baking process.
The Crucial Step: Activating the Yeast
Now, let’s wake up our yeast! This step is crucial for achieving those soft, fluffy rolls we’re after. Here’s how to do it:
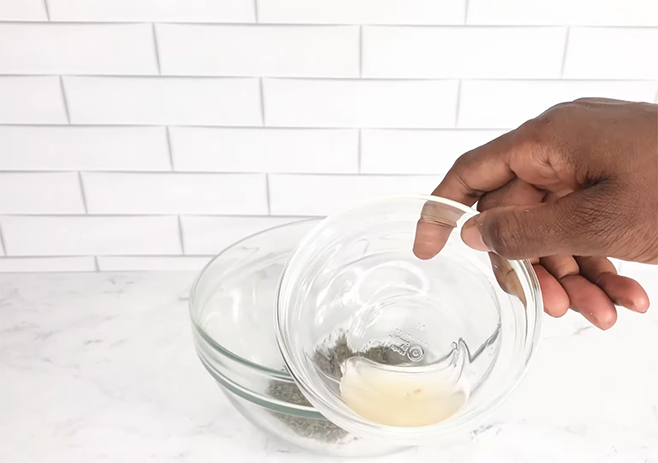
1. In a small bowl, combine warm water (about 110°F) with a pinch of sugar.
2. Sprinkle the active dry yeast over the water.
3. Let it sit for about 5-10 minutes.
4. Watch for the magic! The mixture should become foamy and bubbly.
This foamy appearance is your yeast saying, “I’m alive and ready to work!” If your yeast mixture doesn’t foam up, it might be old or the water was too hot or cold. In this case, it’s best to start over with fresh yeast.
For those using instant yeast, you can skip this step and add it directly to your dry ingredients. But remember, the warm milk in the recipe will still be crucial for activating the yeast.
Think of yeast as tiny living organisms. The warm water and sugar are like a cozy spa day for them, encouraging them to wake up and get to work on making your dough rise.
💡 Key Takeaways: Properly activating the yeast is essential for achieving the soft, fluffy texture characteristic of Logan’s Roadhouse rolls.
Mixing the Dough: Step-by-Step Instructions
Now that our yeast is ready, let’s bring all our ingredients together to create that perfect dough. Follow these steps:
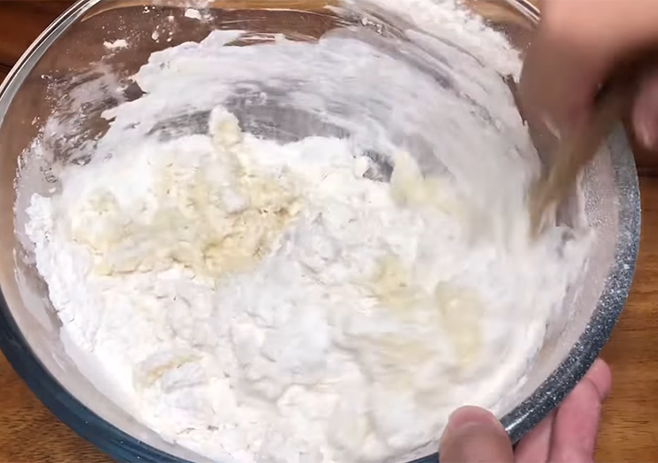
1. In a large bowl, combine the flour, sugar, and salt.
2. Make a well in the center of the dry ingredients.
3. Pour in the activated yeast mixture, warm milk, softened butter, and beaten egg.
4. Using a wooden spoon or your hands, mix until a shaggy dough forms.
5. Turn the dough out onto your floured surface.
6. Knead for about 8-10 minutes until smooth and elastic.
If you’re using a stand mixer:
1. Attach the dough hook.
2. Mix on low speed for 1-2 minutes to combine ingredients.
3. Increase to medium speed and knead for 5-7 minutes.
For bread machine users:
1. Add ingredients in the order recommended by your machine’s manufacturer.
2. Select the ‘dough’ setting and let the machine do its work.
The dough should be soft, smooth, and slightly tacky, but not sticky. If it’s too sticky, add a bit more flour. If it’s too dry, add a splash of warm milk.
Remember, kneading develops the gluten in the flour, which gives the rolls their structure. It’s like giving your dough a workout – it might seem tedious, but it’s essential for those perfect rolls!
💡 Key Takeaways: Proper mixing and kneading techniques are crucial for developing the right dough consistency and texture for authentic Logan’s Roadhouse rolls.
Kneading Techniques: With and Without a Bread Machine
Kneading is where the magic happens in bread-making. It’s what gives our Logan’s Roadhouse rolls their signature texture. Let’s explore different kneading techniques:
By Hand
1. Push the dough away with the heels of your hands.
2. Fold it back over itself.
3. Give it a quarter turn.
4. Repeat for 8-10 minutes.
It’s like giving your dough a relaxing massage!
With a Stand Mixer
1. Use the dough hook attachment.
2. Mix on medium speed for 5-7 minutes.
3. The dough should pull away from the sides of the bowl.
Using a Bread Machine
1. Add ingredients as per your machine’s instructions.
2. Select the ‘dough’ cycle.
3. Let the machine work its magic!
Remember, kneading develops gluten, giving your rolls structure and that perfect chewy texture. Whether you’re using elbow grease or modern technology, the goal is the same – a smooth, elastic dough that’s ready to rise!
💡 Key Takeaways: Whether kneading by hand or machine, the goal is to develop gluten for the perfect roll texture.
The First Rise: Letting Your Dough Rest and Grow
After all that kneading, your dough deserves a break – and it’s during this break that the real magic happens. Here’s how to handle the first rise:
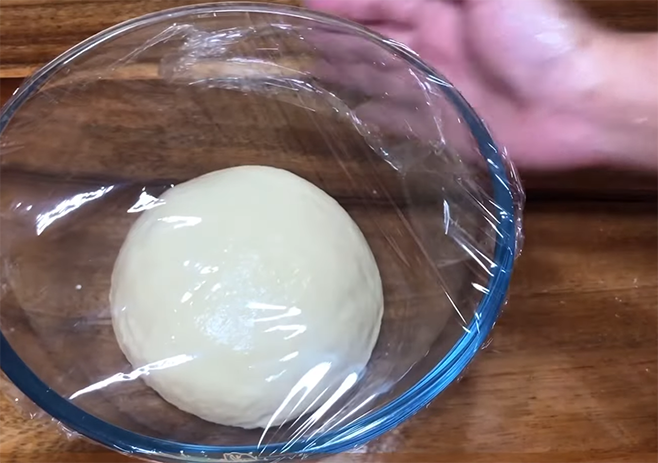
1. Shape your dough into a ball.
2. Place it in a lightly greased bowl.
3. Cover with a clean, damp kitchen towel or plastic wrap.
4. Find a warm, draft-free place in your kitchen.
5. Let the dough rise for about 1 hour, or until it doubles in size.
This warm place could be:
– Inside your oven (turned off) with the light on
– On top of your refrigerator
– In a sunny spot on your counter
During this time, the yeast is feasting on the sugars in the dough, producing carbon dioxide gas that makes the dough expand. It’s like a little yeast party in your bowl!
How do you know if it’s risen enough? Try the poke test:
1. Gently poke the dough with your finger.
2. If the indentation stays, it’s ready.
3. If it springs back quickly, it needs more time.
Remember, patience is key here. Rushing this step can result in dense, heavy rolls instead of the light, fluffy ones we’re aiming for.
💡 Key Takeaways: The first rise is crucial for developing flavor and creating the light, airy texture characteristic of Logan’s Roadhouse rolls.
Shaping Your Rolls: Techniques for Perfect Uniformity
Now comes the fun part – shaping your rolls! This step is crucial for achieving that classic Logan’s Roadhouse look. Here’s how to do it:
1. Gently punch down the risen dough to release air bubbles.
2. Turn it out onto a lightly floured surface.
3. Divide the dough into 12-15 equal pieces. A kitchen scale can help ensure uniformity.
4. To shape each roll:
– Cup your hand over a piece of dough.
– Move your hand in a circular motion, applying gentle pressure.
– This creates surface tension, giving you a smooth, round ball.
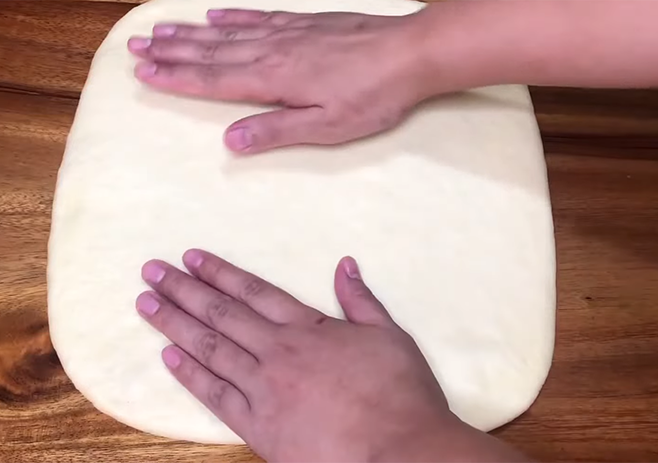
5. Alternatively, you can shape the dough into a rectangle and cut it into squares.
Remember, consistency is key. Evenly sized rolls will bake at the same rate, ensuring each one is perfectly cooked.
For that classic Logan’s Roadhouse look:
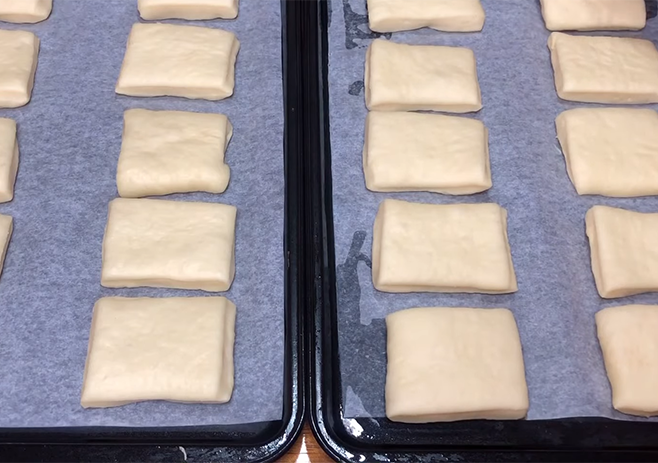
– Arrange the rolls close together on your baking sheet.
– They should be almost touching.
– This proximity helps them rise upwards instead of outwards.
Think of it like arranging a group photo – you want everyone close together, but with just enough space to see each individual!
💡 Key Takeaways: Proper shaping and arrangement of the rolls contribute to their classic appearance and ensure even baking.
The Second Rise: Preparing for the Oven
After shaping your rolls, it’s time for the second rise. This step is crucial for achieving that perfect texture. Here’s what to do:
1. Cover your shaped rolls with a clean kitchen towel or loose plastic wrap.
2. Place them back in that warm, draft-free spot.
3. Let them rise for about 30-45 minutes.
During this time, you’ll see your rolls puff up and grow. They should nearly double in size again.
This second rise is like a final stretch before the big race. It allows the yeast to create more air bubbles, resulting in lighter, fluffier rolls.
How to tell if they’re ready:
– Gently press a finger into the side of a roll.
– If it springs back slowly, leaving a small indentation, they’re ready to bake.
– If it springs back quickly, give them a few more minutes.
Remember, patience here leads to perfection in the oven!
💡 Key Takeaways: The second rise is essential for achieving the light, airy texture that makes Logan’s Roadhouse rolls so irresistible.
Baking to Golden Brown Perfection
The moment of truth has arrived – it’s time to bake! Follow these steps for rolls that are golden brown on the outside and perfectly soft on the inside:
1. Preheat your oven to 375°F (190°C).
2. Place your risen rolls on a prepared baking sheet or in a greased baking dish.
3. Bake for 15-20 minutes, or until the tops are golden brown.
4. Rotate the pan halfway through baking for even browning.
How to check if they’re done:
– The tops should be a beautiful golden brown color.
– Tap the top of a roll – it should sound hollow.
– An instant-read thermometer inserted into the center of a roll should read 190°F (88°C).
Remember, every oven is different. Start checking at the 15-minute mark to avoid over-baking.
The aroma filling your kitchen right now? That’s the smell of success!
Pro tip: For extra golden tops, brush the rolls with an egg wash (1 beaten egg mixed with 1 tablespoon of water) before baking.
💡 Key Takeaways: Proper baking temperature and time are crucial for achieving the perfect golden-brown color and soft interior of Logan’s Roadhouse rolls.
Finishing Touches: Brushing with Melted Butter
We’re in the home stretch now! This final step is what gives Logan’s Roadhouse rolls their signature sheen and extra burst of flavor. Here’s what to do:
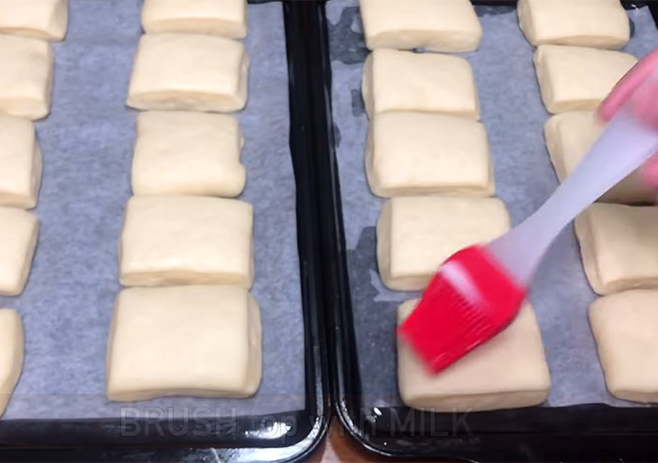
1. As soon as the rolls come out of the oven, grab your pastry brush.
2. Generously brush the tops with melted butter.
3. Be sure to cover the entire surface of each roll.
This step does more than just make your rolls look pretty:
– It adds an extra layer of rich, buttery flavor.
– It keeps the crust soft as the rolls cool.
– It gives the rolls that irresistible shine.
Think of it as putting the finishing touch on a masterpiece. This final brush of butter is what transforms good dinner rolls into mouthwatering Logan’s Roadhouse rolls.
Pro tip: For an extra indulgent treat, brush the rolls with butter again just before serving. It’s like dressing up for a special occasion – that extra touch makes all the difference!
💡 Key Takeaways: The final butter brush is crucial for achieving the signature flavor, texture, and appearance of authentic Logan’s Roadhouse rolls.
Creating the Signature Cinnamon Honey Butter
What’s a Logan’s Roadhouse roll without their famous cinnamon honey butter? Let’s make this heavenly spread to complement our freshly baked rolls:
Ingredients:
– 1/2 cup unsalted butter, softened
– 1/4 cup honey
– 1/2 teaspoon ground cinnamon
Instructions:
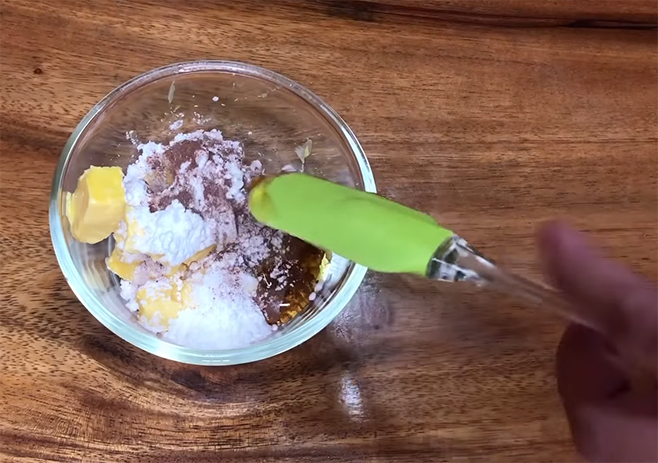
1. In a small bowl, combine the softened butter, honey, and cinnamon.
2. Mix until smooth and well combined.
3. Taste and adjust sweetness or cinnamon to your preference.
This butter is like the perfect dance partner for your rolls. The sweetness of the honey, the warmth of the cinnamon, and the richness of the butter create a flavor explosion in every bite.
Serving suggestions:
– Serve at room temperature for easy spreading.
– Mold into a pretty shape using a butter mold for an elegant presentation.
– Store leftovers in the refrigerator for up to a week.
Pro tip: Make extra! This butter is delicious on toast, pancakes, or even as a topping for grilled vegetables.
💡 Key Takeaways: Homemade cinnamon honey butter elevates the Logan’s Roadhouse roll experience, adding an extra layer of indulgent flavor.
Serving Suggestions and Pairings
Now that you’ve mastered the art of Logan’s Roadhouse rolls, let’s talk about how to serve them for maximum enjoyment:
1. Serve warm: There’s nothing quite like a warm roll fresh from the oven.
2. Family-style presentation: Place the rolls in a bread basket lined with a clean linen napkin.
3. Individual servings: For a more formal dinner,
Conclusion
As we wrap up our journey through the world of Logan’s Roadhouse rolls, we hope you’re feeling inspired to bring a taste of restaurant-quality indulgence to your own kitchen. These soft, buttery rolls are more than just a side dish; they’re a comforting embrace of warmth and flavor that can elevate any meal. By following our step-by-step guide, you’ve learned the secrets to creating these irresistible rolls at home, from activating the yeast to achieving that perfect golden-brown crust.
Remember, practice makes perfect, and each batch you make will bring you closer to mastering these heavenly rolls. Don’t be afraid to experiment with variations or pair them with your favorite dishes. Whether you’re serving them at a family dinner or enjoying them as a treat, these copycat Logan’s Roadhouse rolls are sure to impress.
So, roll up your sleeves, preheat that oven, and get ready to fill your home with the mouthwatering aroma of freshly baked rolls. Your taste buds – and your dinner guests – will thank you. Happy baking!
Nutrition Facts – Amount Per Serving
| Serving | 12 |
| Protein | 5 gr |
| Calories | 180 kcal |
| Fat | 4gr |
| Carbs | 27 gr |
| Cholesterol | 20mg |
| Fiber | 1mg |
| Iron | 1.8gr |
| Calcium | 20mg |
| Sugar | 10g |
Conclusion:
With the simple and straight steps, you can rock these delicious bread out and out. It gives just a super soft, mild cinnamon buttery and spongy textured roll which you never expect for the first time making. The Logan rolls are always served hot, light and mild sweetly flavored. They are not nearly as hard chewed and unsmooth. Let’s hurry to have this yummy fluffy sweet roll.

